
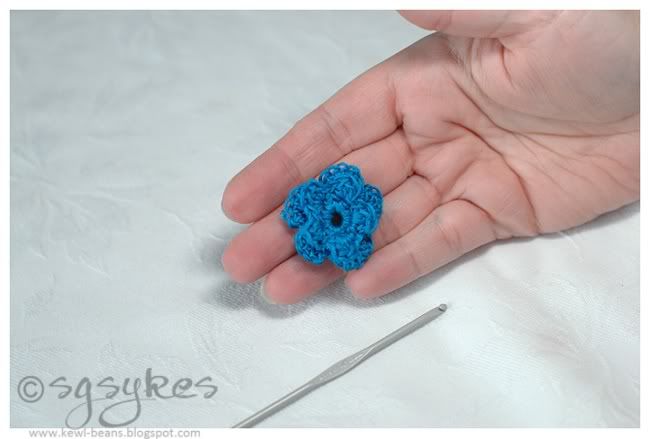
I'm going to show you how to crochet your own flowers to match your layouts. This is a quick and easy way to add customized embellishments to your layouts and cards for a fraction of the cost of those on the market today.
I borrowed a pattern from The Laughing Willow's blog and adapted it slightly to my liking. If you are unfamiliar with crocheting techniques, there are a lot of videos and tutorials out there on the various stitches. For our purposes, here's a legend of the pattern abbreviations used:
- ch = chain
- sl st = slip stitch
- sc = single crochet
- dc = double crochet
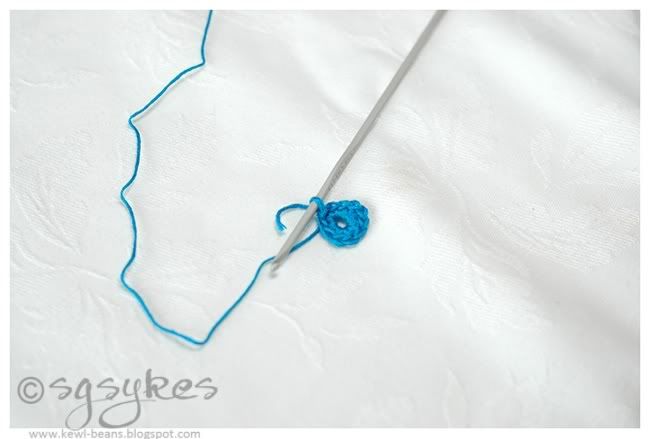
Step 1 - Start with a slip stitch:
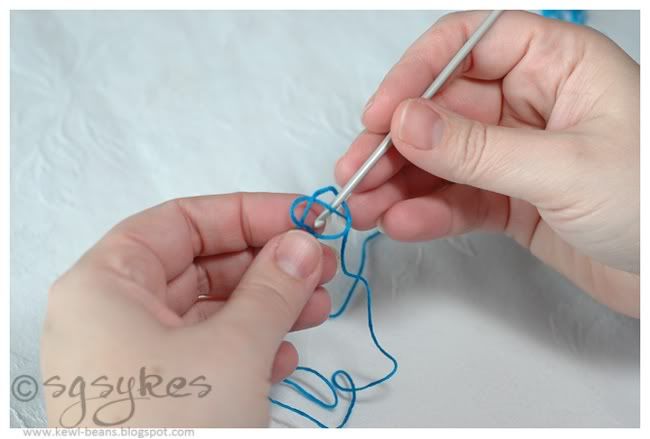
Step 2 - Ch 5:
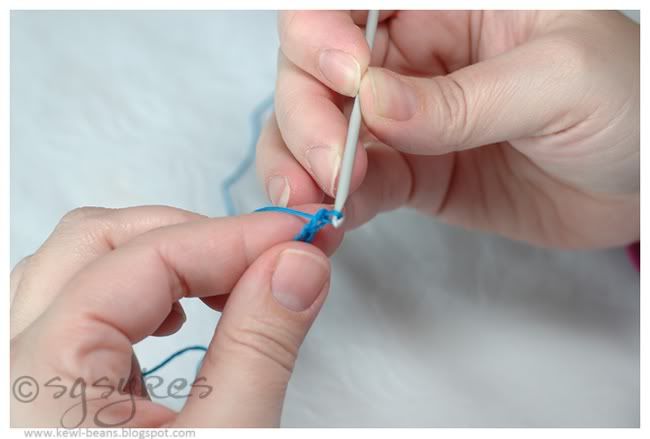
Step 3 - Sl st in first ch to make a ring:
Step 4 - Ch 10 in ring:

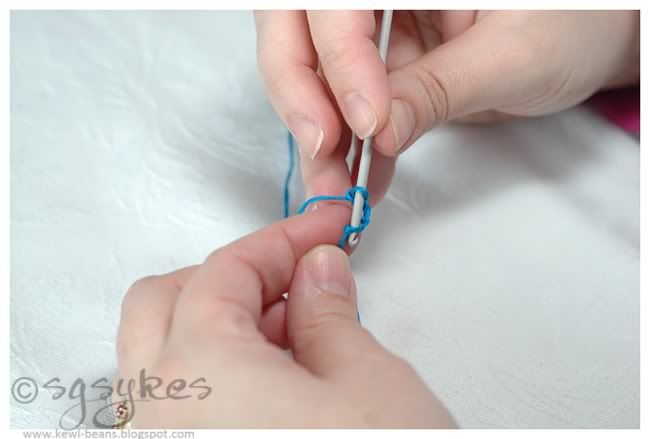
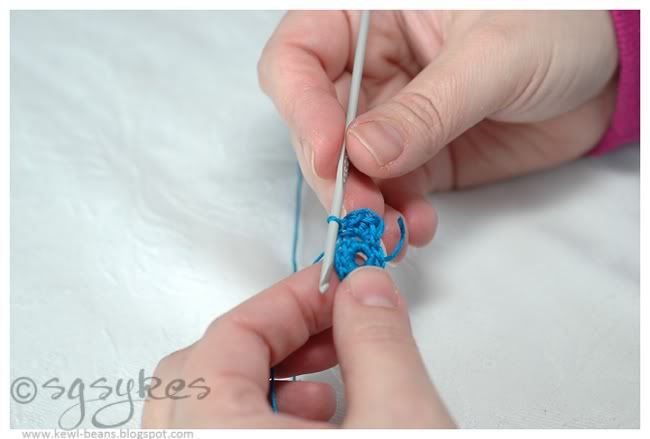
Step 5 - Join with sl st in first sc:
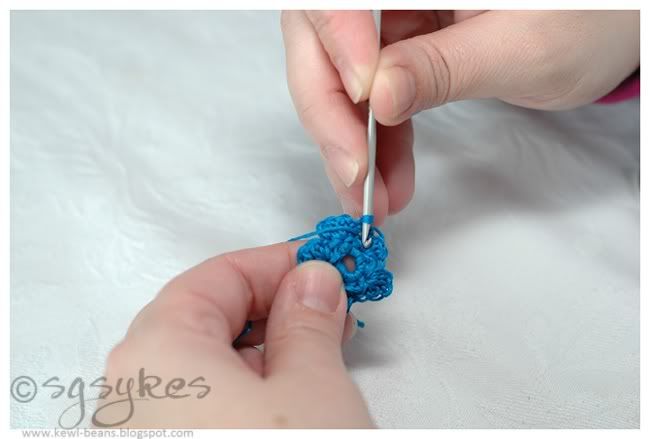
Step 6 - To create a petal, (sc, 3dc, sc) all in first sc:
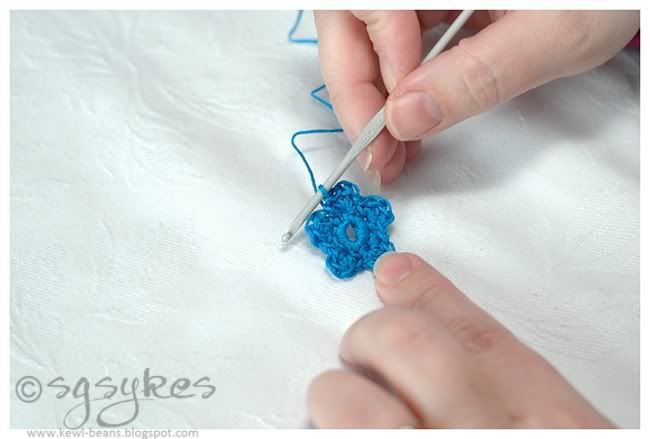
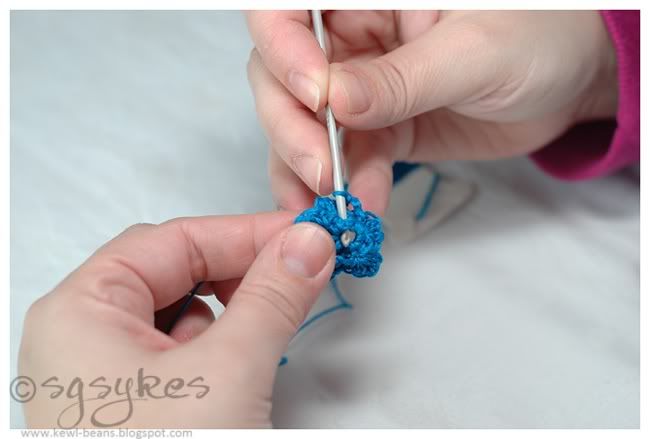
Step 9 - Now comes the tricky part. Flip your flower over and sc in the base of the first petal:
Step 10 - Ch 3 and sc in the base of the next petal:
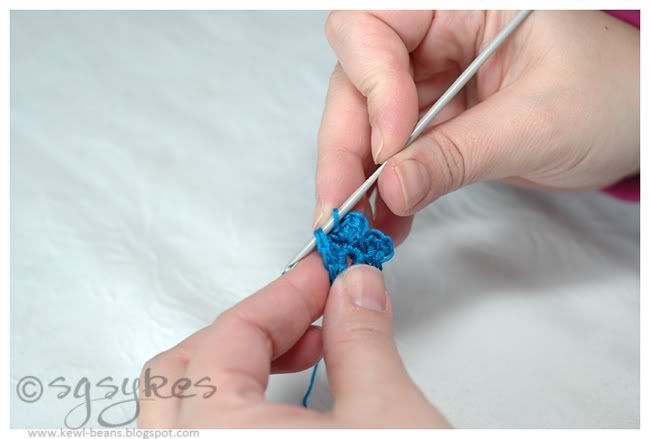
Step 11 - Repeat 4 times until you have five loops. Sl st in first sc:
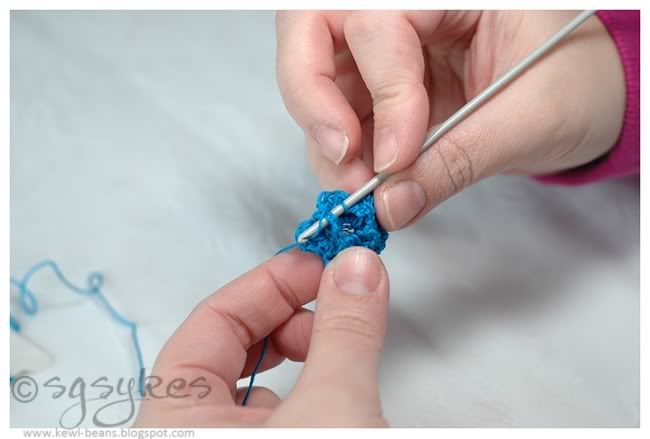
Step 12
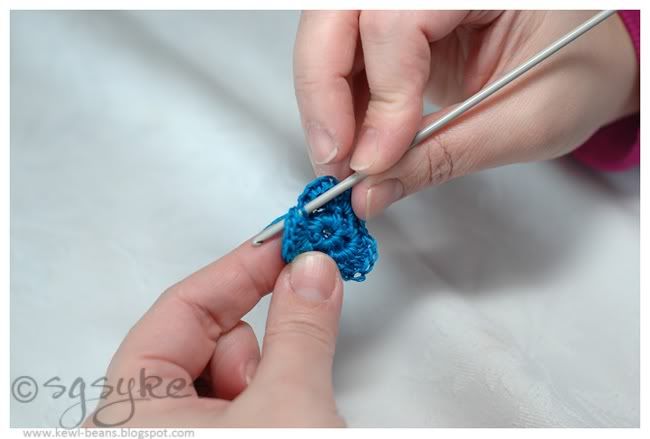
To create a large petal, (sc, 5dc, sc) in first loop:

Step 13 - Create four more petals by repeating the following (sc, 5dc, sc in next loop) 4 times and sl st in first sc:
Step 14 - Finish off by snipping floss and drawing end through final loop to knot.
There are multiple variations on this:
~ Experiment with different textures. I've used embroidery floss, but you can use yarn, cotton thread - even strips of thin fabric!
~ Lengthen your initial chain and begin with ch 14 (or more) to create bigger flowers.
~ Change your floss after Step 8 to create a two-toned flower. You can finish off your flower after Step 8, to create smaller flowers.
Have Fun!

Thanks Sue for the inspiration or should I say the "kick-in-the-butt". There is no excuse now for not trying this. You make it look easy. I'm going to try it out. Thanks!!
ReplyDeleteKelly