Showing posts with label recipes. Show all posts

Tuesday, August 27, 2013

Chocolate Zucchini Bread

A week or so ago, I had purchased four zucchini with the intent of making these delectable little lovelies.

Well...that didn't happen.

So on Sunday, I decided to dig them out of the crisper before they sprouted legs and walked away on their own.  But what to make?  I had a craving for something sweet, but relatively healthy.

Enter Pinterest!

I had pinned this recipe a while ago and so in an effort to try to make some of the items pinned (see my Pinterest Finds page - all tried and true pins!), I decided to try it.

I adapted it slightly to help with the calorie count - it helped... but not by much!  But still, you could probably omit the chocolate chips and use a sugar substitute (read more about using sugar substitutes in baking here).  Because we are trying to eat "cleaner", I would rather use whole foods and eat a smaller piece!

So hard to do sometimes though, especially with this bread!!


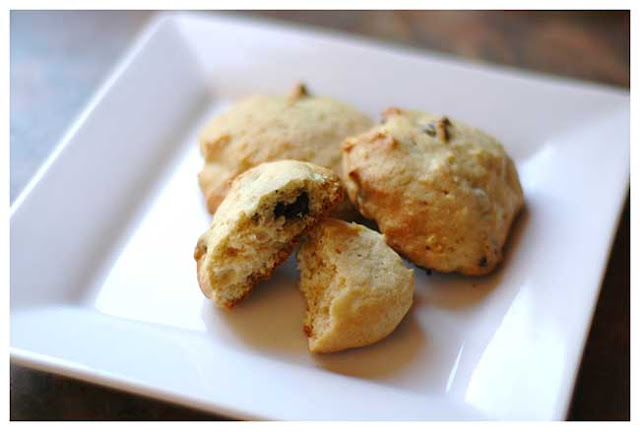
I didn't get a good (read: focused) photo before everyone dug into this so I "borrowed" one from the recipe site.  But doesn't it look delicious!?!  Enjoy!

Chocolate Zucchini Cake - yield 24 servings (3/4" slice)
adapted from allrecipes.com

Ingredients:
2 oz. unsweetened chocolate
3 eggs
2 c white sugar
1/2 c vegetable oil
1/2 c unsweetened applesauce
2 cups grated zucchini
1 tsp vanilla extract
2 c all-purpose flour
1 tsp baking soda
1 tsp salt
1 tsp ground cinnamon
3/4 c semisweet chocolate chips

How To:
Pre-heat oven to 350 degrees F (175 degrees C).  Grease and flour two 9x5 inch loaf pans - or use a mini loaf pan!  Make sure to get the bottom really well to avoid sticking.  (Alternatively, you could line the bottom with parchment paper - wish I had thought of that on Sunday!)

In a glass bowl, microwave chocolate squares, 30 seconds at a time, until almost melted (there will be chunks).  Stir well until chocolate is smooth.  DO NOT OVERCOOK.  Add oil to chocolate slowly, stirring until well combined.  Set aside.

In a medium bowl, add flour, baking soda, salt and cinnamon.  Mix well with a whisk until combined.  Set aside.

In a mixing bowl, combine eggs, sugar, and vanilla and beat until smooth.  Add zucchini and stir slightly.  Add flour mixture slowly, mixing after each addition, until all dry ingredients are incorporated.  Fold in chocolate chips and distribute batter evenly between two pans (or mini loaf pans).

Cook for 60 to 70 minutes, or until a toothpick inserted into the centre comes out clean.

Let cool for at least 10 minutes in pan; run a knife along the edge and carefully turn out onto a wire rack.  Cool completely.  Wrap loaf or store in covered container.  Freezes well!

Cheers,



P/S:  Don't forget about the giveaways/challenges on my blog for a chance to win:
August 2013 Sketchy Challenge (deadline:  Aug 31/13)
Leave Your Legacy: Pet Peeves (deadline:  Aug 31/13)

Wednesday, July 03, 2013

Summertime Cucumber Salsa

I wanted to share this delightful recipe, given to me by my co-worker, fellow scrapbooker and friend, Donna M.


Cucumber Salsa

3 large tomatoes, seeded and diced
1 cucumber, seeded and diced
3 green onions
3 cloves of garlic (I added five or six)
2 tbsp olive oil
2 tbsp vinegar
1/2 tsp salt
1/4 tsp cayenne (I used red pepper flakes)

Mix gently and chill in fridge for a few hours.  Serve with nacho chips.

You could literally just eat this as soon as you make it - it's that good.  However, I like my salsa cold and chilling it allows the flavours to meld and complement each other.

Thank you, Donna!  Now, off to raid my Dad's garden for his famous beefstake tomatoes!


Cheers,


P/S:  Don't forget about the giveaways/challenges on my blog for a chance to win:
1,000th Blog Post giveaway (deadline:  June 30/13 EXTENDED TO JULY 15,2013)
July 2013 Sketchy Challenge (deadline:  Jul 31/13)
Leave Your Legacy: Pet Peeves (deadline:  Aug 31/13)

Wednesday, March 20, 2013

Still here!!

Just running out the door but wanted to let you know that I'm still here!!

I have lots of projects and sneak peeks to share, plus some recipes as I've been cooking up a storm in an effort to eat more whole foods, etc.

I'm also working on a page to list some of my Just Cre8 stamps that are left over in my inventory, as well as some new and gently used scrappy supplies that I am purging through...

Will be back in a day or two!!

Cheers,


P/S:  Don't forget about the other challenges on my blog for a chance to win:
It's a Sketchy Challenge:  March 2013 (deadline:  Mar 31/13)
Leave Your Legacy: Embrace Change (deadline:  May 31/13

Tuesday, December 11, 2012

A Christmas Tradition Continues


Every year, we would all look forward to Christmas.  Not only to spend time with family and friends, but for my mother-in-law's melt-in-your-mouth shortbread.  It was divine.  I actually had to hide it from Gary and the kids or I wouldn't even get a piece!

Last year, I didn't get a chance to keep up with Gary's mom's tradition, after she passed in August 2011.  This year, however, I was determined to try.

I poured over hundred of recipes, looking for the perfect combination of simplicity, taste and what-do-I-actually-have-in-my-pantry??  I finally settled on a simple mixture of four ingredients - and never looked back!


Christmas Shortbread
(source unknown)

Ingredients:
1 c. butter, softened
1/2 c. icing sugar
1/4 c. cornstarch
1 1/2 c. flour

Original Instructions:
1.  Preheat oven to 375°F.
2.  Whip butter until creamy and light.
3.  Sift dry ingredients into large bowl.  Add to butter gradually, beating on low.  Beat on high for 3-4 minutes.
4.  Pat into traditional shortbread pan (or 8x8" square pan) and prick with fork.
5.  Bake 12-15 minutes - do not brown!

Sue's Notes:
I really just winged it for this recipe and aside from the ingredients and temperature, didn't follow the recipe at all!  Here's what I did:

I did whip the butter until it was very light and full of air.  But I'm lazy when baking and didn't sift the ingredients first.  Heck, I didn't even add them gradually!  I just measured them all out and added them to the butter at once.  I did switch to my dough hook on my Kitchen Aid to mix it all together.  Again, I didn't bother to time it - I just kneaded it until all the dry ingredients were incorporated into the butter evenly.

At this point, I decided I wanted cookies instead of bars so I used my mini ice cream scoop to scoop out even amounts of dough.  I rolled them quickly between my palms to even out the balls and laid them on a cookie sheet, about an inch apart.

My oven was set to 375°F on the convection setting and I cooked them for about 13 minutes.  After removing from oven and letting them sit for a minute or so to cool on the cookie sheet, I transferred them to a rack to cool

The photo above shows the cookies right out of the oven, but after they cooled, I rolled them in icing sugar for a bit more decadence.  The option is yours - they are delicious regardless!

My only complaint was that they were a bit bigger than I wanted.  But I would rather have uniformity (via my mini scoop) over petite-ness (via eyeballing).  As I said before, they are so yummy either way!

Enjoy!


P/S:  Don't forget about the following challenges on my blog for a chance to win:
It's a Sketchy Challenge (deadline:  Dec 31/12)
Leave Your Legacy: What You Fear Most (deadline:  Feb 28/13)

Friday, December 02, 2011

Day 2 of Christmas at myStamp BOX

Photobucket

Today was my turn to bring some inspiration to the myStamp BOX blog!

Every year, I try a new recipe to give to my kids' teachers as part of their Christmas gift - nothing like homemade treats to brighten the holidays!  We've made goodies such as chocolate covered pretzel rods and caramel corn, with great results, thankfully!

This year, I found this fun recipe (see below) for "Reindeer Food" - it's easy enough to have the kids help out.  It's also reported to be highly addictive so I'm keeping my distance! 

I recycled a product package by decorating it with patterned paper and stamped a tag to match!


To create the tag, I stamped white Super Stock using the Let It Snow stamp set and Versamark ink.  After heat embossing it with clear embossing powder, I cut it into a tag shape and then sprayed glimmer mists over the embossed images.  I then layered plain white printer paper over the cardstock and using an iron, on low heat, I ironed the tag until the embossing is absorbed by the printer paper, leaving the white cardstock below.  You may want to use two sheets of printer paper if you actually use your iron for household chores... :)

Here's a closer look:


To finish it off, I stamped the sentiment in a darker blue and embellished the tag.  Quick and easy!


Reindeer Food (also known as White Trash or Blizzard Bites)

Ingredients:

2 1/4 cups Cheerios
3 1/4 cups Rice Chex
1 1/2 cups small twist pretzels
3/4 cup peanut M&Ms
3/4 cup nuts
1 bag (12 0z) white chocolate chips

My substitutions:  I used a combination of Rice Chex and Crispix instead of the 3 1/4 cups of Rice Chex, Smarties instead of peanut M&Ms, and cashews as my nut addition - but you can use your own mix!  Just make sure to keep the proportions similar or you won't have enough chocolate to bind it all together.

Instructions:

Stir all ingredients, except white chocolate chips, together gently.  Melt chocolate chips according to package directions, taking care not to scorch.  Pour slowly over ingredients, mixing to coat evenly.

Cover a large baking sheet with parchment or wax paper.  Turn out mixture onto baking sheet and spread out evenly.  Let cool for 30 minutes to an hour.  Break up bigger chunks into bite-size pieces and store in air-tight containers.  Enjoy!


Wednesday, December 22, 2010

Countdown to Christmas

Two more sleeps until Christmas Eve!!

And so much to do, still!

We have always celebrated Christmas Eve at my parents' place.  It's been tradition to head over around 3:00pm, have a wonderful family meal, with traditional Italian staples. 


Staples like scrippelle 'mbusse, which are italian crepes (recipe here) that are sprinkled with parmigiano-reggiano cheese, rolled up and covered with homemade chicken stock.  We usually cut ours into bite size pieces after rolling.  My kids LOVE this soup! 


When my mom was alive, we used to always have City Chicken, too.  I've found several references online that infer that this dish has Polish origins, but it was traditional fare at most of our holiday dinners.  Here's a recipe that uses pork only, but my mom would always use pork and veal.  Not sure if this is on the menu this year, though...


Another tradition that we will continue to honour, though, is the antipasto di mare, or seafood antipasto, that my mom used to make. Ours differs slightly from this image, though, as we add giardiniera and omit the salad.  Seeing the octopus bits in here reminds me of a story...  About ten years ago, my best friend from college, Monica, was unable to afford to fly home for Christmas so my parents, considering her to be their one and only blonde haired, blue-eyed Amazonian daughter (she's 5'10"!), graciously opened their home to her at Christmas.  I'll never forget the look on my mom's face when Monica, upon being served the antipasto di mare, said to her, "Gina, are these testicles on my plate?"  LOL!  Monica turned about fifteen shades of red while we all cracked up, including my mother.  "Tentacles!  I mean, tentacles!!"  Ah, love that girl...

photo via Martha Stewart

Even since I can remember, we've served baccalĂ , which is salt cod, sold by the slab.  Here's a recipe, but we serve ours more simply, dressed with just olive oil, ground black pepper and parsley.  It's so yummy, but can be very salty if not soaked long enough.

Of course, there's also traditional food, usually ham and/or turkey, salad, etc.  My sister always commandeers dessert, for good reason - she makes wonderful desserts!  But there's always traditional desserts, too.


Torrone is a lovely confection that it usually only brought out (at our house, anyways) at Christmas so it always evokes memories of the holidays.  We've always purchased torrone, but I found a recipe online that I may try next year...

And although you may think that every Italian holiday revolves around food (which is partly right), we have other family traditions.  After dinner is done and the kitchen is clean, we open our presents.  We used to open them much later, around 9pm, and then head to midnight mass, but it's just too long for the little ones to wait!  I think it's more that the adults just couldn't stand hearing, "Is it time yet?" and "Can we open our presents now?", over and over... :)  

So now we open our presents earlier, and then as our kids get into their new pyjamas and settle in with their new books (which we always  get for them to open at my dad's place), the adults settle in for family game night!  Games always differ - we've played Sequence, Taboo (girls against boys, of course!) and the Racing Horse game, which my hubby refuses to play anymore, on account that my dad ALWAYS wins... :)) There's also Mexican Train dominoes (my mom's favourite game) and every Italian's favourite games, rummoli and euchre! :)  I'd like to try to introduce Bunco, as I've heard it's a lot of fun!

This year, we're eating later, as my niece and nephew now live in Toronto and Sarah has to work until 2pm.  We are going to head out to Leamington early and visit my aunts and uncles in the afternoon and take the children to the early Christmas mass at 5pm at the church I attended when I was growing up.

I'm off now, to tidy up before we all get ready for the Christmas party for Connor's swim team.  And then it will be another late night of gift wrapping for me - I may have to pour myself a Bailey's on ice to get me through... :)

Wednesday, November 24, 2010

Pumpkin Banana Chocolate Chip Pancakes

On Sunday, I made Pumpkin Banana pancakes for our family brunch.  I adapted this recipe from the Pioneer Woman's Tasty Kitchen blog.

Here's my version:

Ingredients:
2 cups buttermilk pancake mix (the add-water-only variety)
1/2 tsp. cinnamon
1/4 tsp. ginger
1/8 tsp. nutmeg
1/8 tsp. allspice
1 1/4 c. milk
1 tsp. vanilla
2 eggs
1 c. pure pumpkin purée
1 whole ripe banana, mashed

2/3 c. semi-sweet chocolate chips
Instructions: Transfer from griddle to plate and cover with lid or large bowl until ready to serve.  Serve with butter and maple syrup.
1.  Preheat griddle.  Grease lightly with butter.  Or you could spray with a cooking spray, if you wish.  I like my pancake edges crispy so I use butter!

2.  Mix dry ingredients in large bowl.  I used my Pampered Chef Classic Batter Bowl so I could use it to pour the pancake mix directly onto my skillet.

3.  Add the remaining ingredients and mix well.  I found the batter slightly watery so I added more pancake mix (approx. 1/4 c.) until it was the desired consistency.

4.  Pour pancake mix onto griddle, in desired size.  I used about 1/3 c. of the batter which created 5"-6" pancakes.

5.  Cook until edges look dry and top of pancake is full of air bubbles.  Flip pancakes carefully (especially if they are large!) and cook for another minute or until golden brown.
This recipe makes alot - about 10-12 large pancakes!  Luckily, they freeze well - just cover a large cookie sheet with wax paper and place pancakes in single layer.  Cover with another sheet of wax paper and flash freeze pancakes for 30 minutes.  Remove from cookie sheet and store in a freezer Zip-loc.

To serve, remove from freezer and microwave for 15-30 seconds, until warm.

Enjoy!

Sunday, November 07, 2010

Pumpkin Chocolate Chip Cookies

This is a recipe that Aili made with her SK class last year.  They were delicious and since we had these two babies this year for Hallowe'en, we decided it was time to explore our pumpkin recipes! :)

Note:  Time and patience prevent me from walking you through the making of pure pumpkin purĂ©e.  You can check out Martha Stewart's recipe here; E-how.com has instructions here.

Of course, if you are less than handy in the kitchen, you can always used canned pumpkin.  Just make sure it is PURE PUMPKIN, not pumpkin filling which already has spices mixed into it.

Okay, let's get on with it!  This is a great recipe for kids to try so get your kids involved!  Aili was excited to help me today. 

Gather your unsavoury cast of characters...

Ha!  Get it?  Unsavoury?  Because it's a sweet treat recipe...?  Never mind. 

You will need:
1/2 c. butter
1 egg
1 tsp. vanilla
1/2 tsp. nutmeg
2 1/2 c. flour
1 c. chocolate chips (I used semi-sweet)
1 tsp. baking powder
1 tsp. baking soda
1 tsp. salt
1/2 tsp. cinnamon
1 c. pumpkin purée
1 1/2 c. sugar
Begin by preheating your oven to 350F.

Marvel at how quickly your oven face can get dirty after just cleaning it... and wave to your cute assistant in the reflection.  Guess it's not THAT dirty! :)

Dump butter and sugar into a mixing bowl and cream together. 


 Once combined, add vanilla, egg and pumpkin purĂ©e.

 Beat until combined, scraping sides as needed.

Sift together dry ingredients.  If you don't have a sifter, no worries!  I just dumped my ingredients into a sieve, set over a bowl and asked my lovely assistant to stir until it disappeared into the bowl.

Note:  When asking a 6 year old assistant to stir dry ingredients, make sure your bowl is LARGE enough to encase the sieve.  If not, be prepared for a mess.

Add dry ingredients to pumpkin mixture.

Stir until well combined.  Add chocolate chips.

Drop by teaspoonful on well greased cookie sheet.  The batter is slightly sticky so we used two teaspoons to form cookies.  One to scoop batter, the other to push batter off first spoon onto cookie sheet.  Here, Aili demonstrates:

It's important to instill cleanliness in your kids.  While I dropped cookies onto the baking sheets, Aili started the dishes.


She was actually excited to wash them!  If your helpers are young and enthusiastic as well, be sure to take advantage of this stage, as I'm sure it won't last long...

Pop cookie sheets into pre-heated oven and bake for 20 minutes.  Reduce time to 14 minutes if cooking with convection oven. 

Note: All ovens cook differently so check after 12 minutes.  Cookies should be slightly browned and springy to touch.  A toothpick, when inserted, will come out clean when the cookies are done.

Let sit for a few minutes and transfer to cooling rack.

Guard them with your life.  They tend to disappear very quickly when warm.

Come to think of it, they don't last very long after they've cooled, either...

Thursday, June 24, 2010

Last Minute Rushing

photo borrowed from Buns In My Oven blog


I only just decided that I would make another batch of Baked Caramel Corn for Aili's SK teacher, to bring to the end-of-year summer picnic... tomorrow!  Nothing like waiting til the bitter end....

Ah, well... I like to think that I work better under pressure.  That's probably why I found scrapbooking so much easier when I was on a design team!

Anyhow, I am just waiting for my neighbour, Nancy, to come over with her hot air popper so we can chat over tea while it bakes.  I have laundry on, a few teacher cards to make and a picnic lunch to pack.  Oh, and I have to prepare "Save the Date" cards for Aili's classmates for her birthday party this summer!  I'd better get crackin'!

I'm also going to sneak a few peeks as my hubby hangs my second French door in my room.  Oh, I'm getting so excited to see it done!  I was surfing online for all kinds of storage containers for my Expedit shelving, trying to come up with some good colour combinations to go with the dark wood...  I noticed that GRAY is the new taupe colour!  May have to ponder the possibilities...

Off to finish my SuperMom duties!

Monday, June 07, 2010

Banana Split Cake


This dessert was featured in a layout that I did for Vanessa's circle journal (featured in Canadian Scrapbooker in my Works of he{Art} article in the Summer 2006 issue!).


This recipe has been in our family for YEARS.  It's actually my aunt's recipe and I remember having it at her place when we would all get together for holidays.

It's sinful - there's an entire POUND of butter in a 9x13 pan!  (Oh, Ree would be so proud... :))  But as with everything, it's all about moderation.

Except it's so damned good that you won't be able to stop at one piece.  Or five....

I'm just sayin'...  This is why you're not getting a step-by-step photo recipe - this is just too dangerous in my house!!

Anyhow, here's the recipe - Enjoy!

And don't call me when you have to buy new pants... :)

Banana Split Cake

Ingredients:
3 c. graham cracker crumbs
1/2 lb butter, melted (don't say I didn't warn you...)
2 c. icing sugar
1/2 lb butter, softened
1 1/2 tsp. vanilla
2 eggs (*see below)
1 - 19 oz can pineapple, crushed (the pineapple, not the can...)
3 bananas
2 pkgs Dream Whip, prepared

Instructions:
1.  Combine graham cracker crumbs and melted butter.  Press into 9 x 12 inch greased baking pan. 

2.  In a medium bowl, beat together icing sugar, butter, vanilla and eggs for 20 minutes.  Spread evenly over graham cracker crust. 

3.  Drain pineapple well and spread evenly over creamed mixture. 

4.  Slice bananas and arrange over pineapple.

5.  Spread prepared Dream Whip topping over bananas and chill dessert for at least 15 minutes.

A few notes...
Because this recipe contains raw eggs, it NEEDS to be kept refridgerated! 

*If you are leary of using raw eggs in a non-baked dessert (especially if you will be serving this to small children, elderly or ill people), or if the thought of eating raw eggs creeps you out, you can substitute pasteurized eggs or liquid egg substitute that can be found in your dairy section - refer to the carton's directions to find out how much you need to replace the 2 raw eggs. 

Alternately, you can coddle the eggs first.

If you decide to use raw eggs after all, just make sure that they are very fresh!

Monday, May 31, 2010

Chili Cheese Dip

This has always been a big hit at both parties or small get-togethers.  We have even been known to feed the kids an early dinner and steal a late night at-home movie date, with this yummy dish instead of popcorn or chips!

And it's easy-peasy, too!  And although it's more of a winter dish, I thought I'd share it now.  Partly because I love it but mostly because it's the only recipe I have photographed right now... :)

A friend of mine made this once and when pressed, she confessed that she found it on the inside of the Stagg chili can!  I changed it slightly, but still will give most of the credit to the makers of the best canned chili around!

You can also use homemade chili for this, but I think that will be the next recipe I feature....

To make it, you will need:

Stagg Chili (I used Classic, but have been known to kick things up with Silverado Beef, and even the Dynamite Hot on accident!); cream cheese; shredded Monterey Jack cheese.

If you don't have Monterey Jack cheese on hand, you can substitute mozzarella or brick, but I'm warning you... it won't be the same.

Preheat your oven to 400 degrees Fahrenheit.

Soften the cream cheese by warming it in the microwave for about 1 minute (or until it starts popping and threatens to leave an incredible mess).  I leave it in the foil wrapper AND the box to avoid this.

Dump the cream cheese into an 8x8 glass or metal pan and spread evenly on bottom.
The original recipe calls for salsa to be spread on the cream cheese, but since everyone else in my family seems to have an aversion to salsa, I omitted it.

Next, open the can of chili and dump onto the cream cheese.  My suggestion would be to dump it in the middle of your pan, because for some reason, the beans are ALWAYS at the bottom.  This allows you to spread them out over the entire dish.
At this point, you could add finely diced jalapeno or even habanero peppers to spice it up, if you're not a coward when it comes to all things spicy.

Like me.

Add the grated cheese on top of the chili.  I usually don't measure - must be the Italian thing - but I just add enough to lightly cover the chili, for the most part.  Any less and it's just chili and cheese... and any more, and the entire cheese layer will just lift right off after cooling for 5 minutes or so.

Pop this into your pre-heated oven for 20 minutes or until bubbly around the edges.  Remove from oven and let stand for a few minutes to avoid serious tongue-burning incidents...
Now there's a variety of ways to serve this.  You can add baguette slices to the side, so your guests (or you) can spoon the chili mixture over top.  Or you can serve with Tostito Scoops, which are perfect little bowls to scoop up that chili goodness.

My favourite, though, is to serve with a spoon ( to avoid double dipping offenders) and a bowl of Fritos Scoops!  Oh, what a little bowl of Heaven...

Monday, May 10, 2010

Caramel Apple Baked Brie

I made this hot appetizer at Holly's on Friday night - and while this photo certainly doesn't do it justice, it's a warm, gooey, sweet mess that will delight your senses and could quite possibly add 5 pounds in one sitting. 

But that's no reason to not try it.

But first, a disclaimer:  These photos were taken at about 7:30pm with barely any natural light, no flash, and only my overhead potlights on.  I had to use a very small aperture (f/1.8) which resulted in a very small depth of field.  I mean to say that only a small area of each photo is in focus.  So don't blame my poor focussing skills! :)

What you'll need:


Granny Smith or Gala apple, sweetened dried cranberries, pecans (unless allergic), brown sugar, butter, apple juice (or brandy), baguette and a wheel of Brie cheese.

Directions:

Preheat oven to 350 degrees Fahrenheit.

Peel and chop apple into fairly small pieces.

Chop pecans finely, if using. (And unless you have allergies, I'd recommend using them - they add a wonderful complement to the sweet cranberries and brown sugar!)

Melt butter in a small saucepan over medium heat.  Do not burn! (and I speak from experience...)

Measure out brown sugar and pack loosely.  Add to melted butter and stir well, until melted.

Add apple, pecans and cranberries to butter/sugar mixture, along with 2 tablespoons of apple juice.  You can also use brandy, if you're having a "grown-up" appetizer party.

Lucky dog, you.

Cook mixture for a few minutes until apples are soft.

Meanwhile, slice baguette into thin 1/4" slices, making sure to keep them in order.

Wrap entire cut loaf in foil.

Unwrap Brie cheese and slice in half, horizontally.  Be sure to use a sharp knife.  It may help to run the knife through hot water first so it doesn't stick to the cheese as much.

Place wheel half in ungreased pie pan.  Spoon half of the apple mixture on top of the cheese.

Cover with remaining wheel half, secure with toothpicks.

Pour remaining sauce over top.

Place Brie and baguette in oven and bake 15 to 20 minutes, or until cheese is gooey and sugar mixture is bubbling.

The Brie's rind keeps the soft cheese contained but it spoons out easily for serving.  If you prefer it to melt more, increase your heat to 400 degrees Fahrenheit when baking.  Keep on eye on it, though, because it can burn quickly!

If you are having a grown-up party and don't want to serve from your pie plate (or cake pan, as I have here, because I think my pie plate may be in the garage - don't ask), you can dress this appetizer up.

Using a spatula, carefully move the cheese to a pretty plate.  Make sure it has a lip to catch juices.  Pour juices from pie plate over cheese. 

Place plate on larger serving dish.  Remove bread from foil and arrange around plate.

Be sure to sneak a few bites before bringing this out to your guests or you may not get any!

Ingredients:

1/2 cup chopped and peeled Granny Smith apple
1/4 cup sweetened dried cranberries
1 tablespoon pecans (optional)
1/4 cup brown sugar, packed
1 tablespoon butter
2 tablespoons brandy or apple juice
1 small wheel Brie cheese

Wednesday, April 07, 2010

Black Bean Salsa

Well, the quiche was a big hit at Easter, but my family is now officially quiched out so I won't be making another for a few weeks, for fear of mutiny.  When I do, I will definitely take step-by-step photos and share the recipe with you.

For now, I will leave you with one of my favourite quick-n-easy recipes to bring to a potluck or party.  Heck, it's even good to have in your fridge for a snack!  Or serve it over chicken for a bit of zing!

Black Bean Salsa

2 jalapenos, seeded and chopped (can adjust to suit taste)
2 - 15 oz cans black beans, rinsed and drained
1 - 17 oz can whole kernel corn, drained
2 large tomatoes, seeded and chopped
1 large avocado, peeled and chopped
1 red onion, peeled and chopped
1/4 cup cilantro, chopped
3 T olive oil
1 tsp. salt
1 tsp red wine vinegar
1/2 tsp black pepper, freshly ground
1 tsp minced garlic

Mix all ingredients, except avocado. Chill until ready to serve. Add avocado just before serving, to avoid browning.

Enjoy!

Friday, April 02, 2010

Houston, we have a WINNER!

Time's up!  Our March RAK has come to a close and I just realized what a HONKIN' prize that is!!  Must have been all that drinking I did while the kids were gone...

I'm KIDDING!  All I'm gonna say is that April will probably not be as exciting... ;)

But let's get to the point!  Thanks to http://www.randomizer.org/, my most favourite winner-picker, aside from my kids (who'd better be sound asleep at this ungodly hour... yes, it's 2:40am...), WE HAVE A WINNER!


And the 11th person to comment is...

Laurie (Wally) said...

I am following.. as of last night... love your blog
March 14, 2010 8:19 PM

Congratulations, Laurie!!  Please email me your mailing info to justinfo{at}justcre8{dot}com and I will send your package out to you!

On another note, as you may have noticed, no Thursday meatball recipe today!! :(  But meatballs just seem so... winterish and I'm all about spring now!  I've had the roof off on Lola for 2 days running now and spring fever is running rampant!

I will hopefully be sharing a recipe with you Saturday night though, depending on how it tastes!  I made it to bring to our Easter brunch with my family tomorrow - if it's a hit, I'll make it again for our Easter Sunday dinner so I will have a chance to take pictures this time!
Related Posts Plugin for WordPress, Blogger...